Super Easy Easter Bunny Cake
Planning a get together for Easter? Then this is the cake for you! It's got all three S's covered: Simple, Scrumptious, and it will make everyone Smile. The best part is it's so easy you can have the kids help. How proud will they be when they tell everyone they decorated the cake!
You'll Need:
-Cake board (a 13x19 in. should be good)
-Aluminum foil or waxed paper (to cover the board)
-2 baked 9-inch round cake layers, completely cooled
-1 8 oz. tub of frosting (Cool Whip tastes great if you don't like frosting that is too sweet)
-1 7 oz. pkg. Coconut Flakes (if you don't like coconut, just icing will do)
-Candy for decorating (suggestions: licorice, gumdrops, jelly beans, mini chocolate eggs, m&m's, etc)
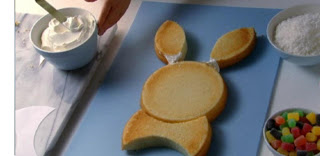
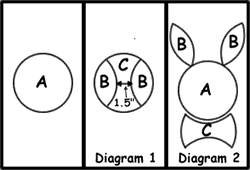
1. Prepare your cake board with either aluminum foil or waxed paper. You will use one round cake layer as the face of the bunny. The other will need to be cut out to form the ears and the collar. For this it is best to cut out a template to make sure the collar will fit the bunny's head. Tip: for a clean cut use a serrated knife.
2. Next place the bunny's face (the round cake layer on the cake board) and arrange the ears and the collar until you have it the way you want it.
3. Once you have it set up the way you want, use a little icing or cool whip to "glue the pieces to each other.
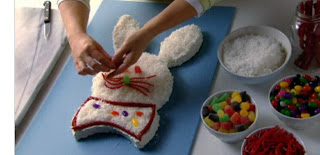
4. Once that is done frost the whole cake with frosting or cool whip and sprinkle the coconut flakes all over. This becomes the bunny's fur. Of you don't like coconut, you can just stick with the frosting, or for a little more work, cover with chocolate flakes. Yum!
5. Lastly, decorate with the assortment of candies you have chosen. Tip: for pink bunny ears you can take some of the coconut flakes and tint them pink with a little food coloring. Or you can just outline the ears with pink or red jelly beans (
Once you are done, it's picture time. Oh, and if you used cool whip, make sure to keep it refrigerated. And in case you need a quick overview on how to assemble the bunny cake take a look at this diagram. Tip: if you are looking to save some money, pick candies that you can use leftovers for easter eggs or goody bags.
This recipe has been around for ages and it has even become part of family tradition for many families everywhere. Now it can be part of yours. Enjoy and Happy Decorating!
Quote of the Day: "Definitions belong to the definer, no the defined." - Toni Morrison
Brain Teaser:
What kind of king can you make if you take
the head of a lamb
the middle of a pig
the hind of a buffalo
and the tail of a dragon?
(answer to Monday's Brain
You've added this content to your favorites.

Post your comment
Load More


